
Quck answer
Building a picket fence is a DIY project that requires planning, preparation, and some basic woodworking skills. Here are the key steps to follow:
1. Planning: Measure the area where the fence will be installed and determine the number of pickets needed. Decide on the height and spacing of the pickets.
2. Materials: Gather the necessary materials, including pickets, posts, rails, nails, and concrete mix.
3. Marking and Digging: Mark the fence line and dig holes for the posts. Ensure the holes are deep enough for stability.
4. Installing Posts: Set the posts in the holes, ensuring they are plumb and level. Fill the holes with concrete mix to secure the posts.
5. Attaching Rails: Attach the rails to the posts, using screws or nails. Ensure they are level and evenly spaced.
6. Installing Pickets: Attach the pickets to the rails, leaving a small gap between each picket. Use nails or screws to secure them.
7. Finishing: Paint or stain the fence to protect it from the elements and add aesthetic appeal.
Remember to wear appropriate safety gear and follow local building codes and regulations throughout the process. With patience and attention to detail, you can successfully build a picket fence.
The picket fence is a beloved choice among homeowners due to its nostalgic appeal and practical advantages. It not only enhances the curb appeal but also serves as a friendly boundary that doesn’t obstruct the view like other fences.
If you’ve decided to add a picket fence to your property, it’s a great DIY project for a moderately skilled homeowner with basic knowledge of tools. Picket fences are relatively simple structures, and many home improvement stores offer pre-made fence panels with pickets already installed. However, building the picket fence yourself allows for creativity and personalization, enabling you to design a unique fence that matches your style.
Components of a Picket Fence
Constructing a picket fence is much easier than assembling a kid’s LEGO set. It’s far less challenging since a picket fence consists of only three main parts: posts, pickets, and rails. Additionally, there are a few extras, such as nails or screws, paint or stain, and decorative caps. Unlike that frustrating LEGO set, a picket fence has only three components that are assembled in a straightforward manner.
The fence posts are placed in the ground approximately 6 to 8 feet apart, depending on personal preference and the landscape. If there are obstacles like tree roots or rocks, you may need to adjust the spacing between posts to maintain symmetry. While you can modify the size of the post and rail lumber according to your design, a square 4×4 post and 2×4 rails are standard measurements. The horizontal rails connect the posts, with two rails between each post spaced evenly apart. The pickets are then attached to the rails.
The width of the pickets is flexible, allowing for personal preference and style. Typically, standard picket fences have pickets that are 2 1/4 to 3 inches wide, with a square top cut. However, this is not a strict rule, and you can get creative by using wider or narrower pickets and selecting a spear, pointed, or rounded top design to give your fence a unique look. If you prefer, you can purchase individual fence posts from a manufacturer to save time and effort. Alternatively, you can customize your pickets or create your own using standard 1-by lumber if the desired size or design is not readily available.
The spacing between pickets can also be adjusted based on preference and function. Typically, pickets are spaced the width of one picket apart, but altering the spacing will affect visibility and privacy. To determine the most aesthetically pleasing option, you can temporarily attach a few pickets with different spacing to the fence rails. If you have children or pets, it’s important to ensure the spacing is not too wide, similar to a stairway railing. For households with children, use a spacing of less than 4 inches between pickets to keep them safe and prevent any curious heads from getting stuck.

Image Credit:
RobertCrum/iStock/GettyImages
Preparation and Guidelines for Building a Picket Fence
While you have the freedom to add your personal touch to certain aspects of your fence installation, there are specific rules and guidelines that should be followed during the process. Before constructing your picket fence, it is important to check with your local municipality to determine if a permit is required. Fence size, style, and post-hole requirements may vary from town to town. If you belong to a homeowners’ association, it is also advisable to consult with them. Additionally, contacting local utility companies prior to digging holes for the posts is necessary.
A traditional wooden picket fence is typically 3 to 4 feet in height. However, the exact height will depend on the size and design of your house and property. A 3-foot fence may be visually appealing for a small ranch or cottage, while a taller 4-foot fence would complement a larger home or one with a spacious yard. It is crucial to ensure that everything remains straight and level during the installation process. The posts and rails should be straight and even, and the pickets should be plumb and evenly spaced. Having a helper will expedite and simplify the fence installation, especially when setting the posts.
There are two basic options for post installation: setting them in concrete or in gravel. While this is a personal decision, gravel is generally a preferable choice for a picket fence. Concrete provides greater stability, particularly in high winds, although a picket fence is less affected by wind compared to a solid fence. Concrete, however, does not protect against moisture and rot and makes post removal difficult. On the other hand, gravel helps prevent rot by allowing ground moisture to drain away from the post. If you ever need to replace a post or rebuild the fence, removing a post from gravel is relatively easy.
Consideration should also be given to painting or staining the fence. The common image of a picket fence is a white one, but you can choose any color for your fence (as long as it complies with any HOA requirements in your neighborhood). While it may be tempting to paint your posts, rails, and pickets before installation for convenience, whether or not to do this depends on the type of wood used for the fence.
For instance, cedar can be painted immediately, and delaying painting for too long can result in additional preparation work when you eventually decide to paint. Conversely, pressure-treated wood should be allowed to dry for three to four months before painting or staining. It is important to research painting guidelines for the specific type of wood you are using before applying paint or stain to your picket fence.
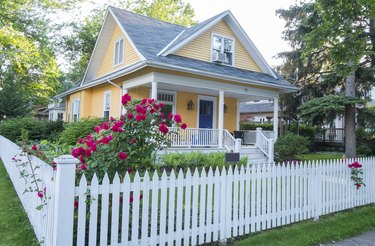
Image Credit:
Chiyacat/iStock/GettyImages
Guide on Building a Picket Fence
Step 1: Establish a Straight Line
Place a small stake at each edge of the desired location for your picket fence. Stretch a string between the stakes, ensuring that it is 6 inches off the ground. This will serve as a guide for aligning the fence posts in a straight line. Use spray paint or additional stakes to mark the center of each fence post location on the ground. The posts should be spaced evenly and no more than 8 feet apart.
Step 2: Excavate the Holes for the Posts
Using a tool called a post-hole digger and a shovel, dig all the holes needed for the fence posts. If your fence is large and requires many holes, using a post-hole power auger can make the job easier and save time, as well as prevent back pain. The depth of the holes should be approximately 2 feet, with an additional 4 inches for adding gravel.
A general guideline for fence posts is to have 1/3 of the post below ground and 2/3 above ground. For a picket fence that is about 4 feet tall, use 6-foot posts. If your fence is shorter than 4 feet, adjust the hole depth or cut the posts accordingly.
Step 3: Position the Fence Posts
Use a pencil to mark each post at a height of 4 feet (or the desired height of your fence), taking into account the 6-inch string height used in the previous step. This marking will ensure that all the posts are at the same height. Pour a 4-inch layer of crushed gravel into the first hole. Place the post in the hole and add another 5 inches of gravel around it. Use a level or post level to ensure that the post is plumb.
Repeat this process for each post, adding gravel until it is a few inches below the top of the hole, and then fill the rest with soil. If you choose to set the posts in concrete, fill the hole with concrete, leaving a few inches of space at the top. After the concrete sets, fill the remaining space with soil.
Step 4: Mark the Rail Positions
Measure down from the top of each post and make marks at 8 inches and approximately 28 to 30 inches. These marks indicate where the top of the fence rails will be positioned. The standard practice is to place the top rail about 8 inches from the top of the fence and the bottom rail about 8 inches from the ground, but you can adjust these measurements to suit your design.

Image Credit:
fotoVoyager/iStock/GettyImages
Step 5: Install the Rails
Measure the distance between the posts and cut the 2×4 rails to fit. Add 3 inches to the measured distance for each post. This extra length will allow for a 1 1/2-inch overlap on each side to secure the ends of the rails to the posts. Attach the rails to the posts using deck screws or galvanized nails, with screws being easier to remove if necessary.
Step 6: Cut the Pickets
Determine the desired height of the pickets in relation to the posts and the ground. It is recommended to leave a 2-inch gap between the bottom of the picket and the ground to prevent rotting and warping, as well as to provide space for grass cutting. Use a miter saw to cut each picket to the desired length, ensuring a straight cut. Cut a spacer to maintain even spacing between the pickets during installation.
Step 7: Mark the Picket Height With a String
Measure and mark the desired height of the top of the pickets on each post. Attach a string to the posts to serve as a guide for the picket height. Ensure that the string is tight and has no slack. Repeat this process between each fence post.
Step 8: Putting the Pickets in Place
Aligning the top of the pickets with the guide string and using the pre-cut spacer between the pickets, put the pickets in place and secure them with deck screws or nails that are suitable for outdoor use. Despite using a spacer, it is crucial to check each picket with a level before and after installation to ensure that it is perfectly vertical before proceeding to the next picket.
