
Quck answer
To raise calcium hardness in a swimming pool, you can follow these steps:
1. Test the water: Use a pool test kit to determine the current calcium hardness level. The ideal range is between 200-400 ppm (parts per million).
2. Add calcium chloride: If the calcium hardness level is low, you can increase it by adding calcium chloride. Follow the manufacturer’s instructions for the correct dosage based on your pool size.
3. Distribute evenly: Add the calcium chloride directly to the pool water, preferably near the water return line. This will help distribute it evenly throughout the pool.
4. Circulate the water: Turn on the pool pump and let it run for at least 24 hours to ensure proper circulation and distribution of the calcium chloride.
5. Retest and adjust: After 24 hours, retest the water to check the calcium hardness level. If it is still below the desired range, repeat the process until the desired level is reached.
Remember to regularly test and maintain the calcium hardness level in your pool to prevent issues such as corrosion or scaling.
Together with pH and total alkalinity, the level of dissolved calcium is an important factor in maintaining water balance in a swimming pool. This level is commonly referred to as “hardness” of the water. High calcium levels indicate hard water, while low levels indicate soft water. Although there are other minerals dissolved in water, such as magnesium, calcium is the main concern. Excess calcium (hard water) can be damaging to a pool, while low calcium levels (soft water) can also lead to problems.
Low calcium levels (soft water) can cause plaster or concrete pool walls to lose calcium to the pool water and can also impact the elasticity of vinyl pools. This can result in costly damage, so pool owners need to address low calcium levels promptly.
On the other hand, high levels of calcium can cause scale deposits in pipes and parts, leading to damage in the filtration system. In certain regions of the US, such as the Southwest, hard water is an ongoing issue for pool owners. The evaporation of water, which is accelerated in hot, sunny climates, gradually increases the concentration of dissolved calcium in the water, making it harder.
The ideal calcium hardness reading for pool water is around 200 to 400 parts per million. Fortunately, calcium hardness changes slowly, so testing and adjustment once a month should be sufficient.
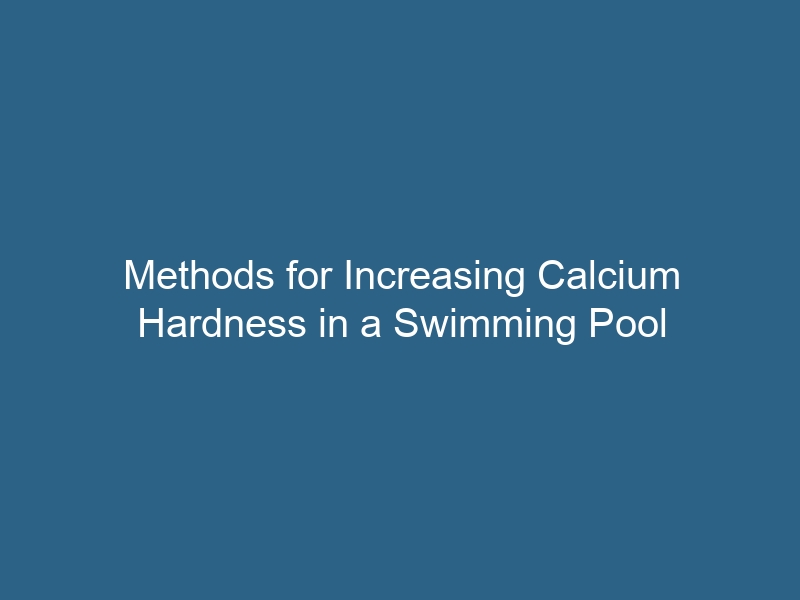
Step 1: Test the Water Using a Test Strip
Dip the calcium hardness test strip into the pool water.
Use a test strip from the calcium hardness test kit to test the water for calcium hardness. Dip the strip into the water, making sure to reach the deep end of the pool.
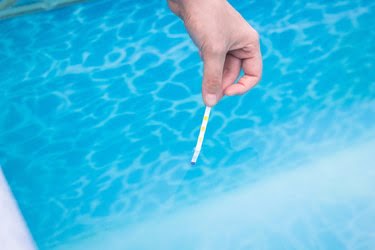
Step 2: Interpret the Results
Compare the test strip to the color chart in the kit.
Remove the strip from the water and compare the color on the strip to the color chart in the kit. This will indicate the hardness level of the water. If the level is below 200 ppm, it needs to be increased. If the level is above 400 ppm, proceed to step 7.
Step 3: Measure the Amount of Calcium Chloride

Determine the necessary amount of calcium chloride to increase the hardness level.
Calculate the amount of calcium chloride needed based on the desired increase in hardness level. Use 1 1/4 pounds of calcium chloride per every 10,000 gallons of water to raise the level by 10 ppm. Use 2 1/2 pounds (per 10,000 gallons) to raise the level by 20 ppm, or use 6 1/4 pounds (per 10,000 gallons) to raise the hardness level by 50 ppm.
Step 4: Prepare the Solution

Mix the calcium chloride with water in a bucket.
Fill a bucket with warm water and gradually add the measured amount of powdered calcium chloride to the water. Never add water to the compound. Allow the calcium chloride to dissolve completely.
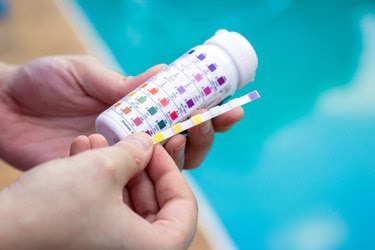
Step 5: Add the Solution to the Pool
Pour the mixture into the deep end of the pool.
Begin pouring the mixture into the deep end of the pool and slowly walk around, pouring the solution until it is fully distributed. Turn on the pool filter and let it run for at least six hours.
Step 6: Double-checking the Hardness

The following day, retest the calcium level. Assuming it is accurate, proceed to check the chlorine and alkalinity levels, making adjustments as necessary. Restore the normal operating schedule for the pool filter.
Step 7: Lowering Calcium Hardness, if Needed
If the calcium level exceeds 400 ppm, the water is excessively hard, and measures must be taken to reduce it. The most effective method is to drain a portion of the pool water and replace it with fresh water. This will dilute the calcium concentration, thereby reducing its level.
In cases where the calcium amount is significantly higher than 400 ppm, it may be necessary to drain and refill up to 1/4 of the pool water to bring the calcium hardness back within the acceptable range.
