

Quck answer
To ground and bond Hayward pool pumps, follow these steps:
1. Ensure the pump is unplugged and the power is turned off.
2. Locate the grounding lug on the pump motor. It is usually a green screw or terminal.
3. Attach a copper grounding wire to the grounding lug.
4. Connect the other end of the grounding wire to a grounding rod or the main electrical panel’s grounding terminal.
5. Use a wire connector to securely fasten the grounding wire to the lug or terminal.
6. To bond the pump, connect a bonding wire to the bonding lug on the pump motor.
7. Connect the other end of the bonding wire to the pool’s bonding grid or any other metal components that are bonded together.
8. Securely fasten the bonding wire using a wire connector.
By properly grounding and bonding Hayward pool pumps, you can ensure safety and protect against electrical hazards.
Incorrect grounding and bonding of a swimming pool pump can have fatal consequences. Grounding allows for faster circuit breaker action, while bonding connects conductive metal parts to ensure they have the same electrical potential. Together, they reduce the risk of lethal electric shocks. Hayward Pool Products offers various models of swimming pool pumps, but the grounding and bonding requirements are consistent across the product line. By following the installation guidelines provided by Hayward Pool Products and adhering to the National Electrical Code for grounding and bonding, you can create a safer pool environment.
Grounding
Step 1
To begin, attach the insulated ground wire to the green ground screw located near the terminal plate of the motor. Strip the insulation by 3/4-inch and wrap the wire around the screw. Ensure the screw is tightened securely. According to article 680.21 of the National Electrical Code, swimming pool pump ground wires must be insulated. Do not connect power wires until the ground wire installation is complete.
Step 2
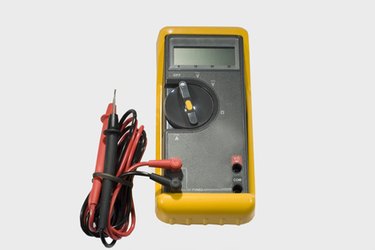
Use a multimeter to confirm the ground connection.
Use a multimeter to verify the ground wire connection. Set the multimeter to test for continuity. Place one lead on the ground wire near the green ground screw and the other lead on the motor frame, directly opposite the ground connection. The multimeter should indicate continuity.
Step 3
Next, connect the ground wire to the ground connection or to the circuit ground wire in the time clock or electrical panel. The ground wire must establish a path back to the main electrical panel to facilitate the functioning of the circuit breaker, as explained by Carl R. Nave, an associate professor of physics at Georgia State University and the webmaster of HyperPhysics. Do not substitute an “earth ground” from a grounding rod or bonding connection. The ground wire can be connected using wire nuts, terminal screws, crimps, or other approved connectors. Once the ground connection has been established, the power connections can be made. Do not energize the motor until the bonding connection has been completed.
Bonding
Step 1
Locate the external bonding lug on the pump motor. The bonding lug is a pressure wire connector with a screw to secure the bond wire.
Step 2
Attach the bond wire to the external bonding lug. The bond wire must be a bare, solid copper wire. According to the National Electrical Code, it should be at least No. 8 AWG wire (No. 6 AWG in Canada). It cannot be an insulated or stranded wire. Secure the bond wire using the screw on the external bonding lug. If you are replacing a pump and transferring the existing bonding wire to the new pump, this step completes the bonding process.
Step 3
Complete the bonding of all electrical equipment in new installations. The National Electrical Code requires that all electrical equipment, except for double-insulated equipment, be bonded together. Additionally, all metal within 5 feet of the inside of the pool wall must be bonded with the equipment to create an equipotential bonding grid.
