

Quck answer
To improve yard drainage, you can build a swale. A swale is a shallow trench or depression that helps to redirect water away from your yard. Here are the steps to build a swale:
1. Determine the location: Identify the area in your yard where water tends to accumulate or flow towards.
2. Dig the trench: Dig a trench along the contour of the land, making it about 1-2 feet deep and wide. The length of the swale depends on the size of your yard.
3. Shape the swale: Gradually slope the sides of the trench to guide water towards a desired area, such as a drainage ditch or a rain garden.
4. Add gravel or rocks: Place a layer of gravel or rocks at the bottom of the swale to help with water infiltration and prevent erosion.
5. Plant vegetation: Plant grass, shrubs, or other suitable plants along the sides of the swale to stabilize the soil and enhance water absorption.
Remember to regularly maintain the swale by removing debris and weeds to ensure proper functioning. Building a swale can significantly improve yard drainage and prevent water damage.
A swale is a landscaping technique that involves shaping the ground with a shallow ditch to control the flow of rainwater. The purpose of a swale can vary – it can either slow down the runoff and allow the water to seep into the ground, or redirect the water away from the house foundation to a specific area.
While the primary goal of building a swale is functional (to manage water flow), many homeowners also use this technique to align with permaculture principles, which mimic natural features and processes.
Choosing the Right Time to Build a Swale
In modern eco-friendly landscaping, a swale is often used to prevent rainwater from entering street storm sewers along with harmful chemicals and materials. By slowing down the runoff, a swale allows the water to be absorbed into the ground or directed to a safe location.
For instance, a swale can be constructed to guide water from a roof gutter downspout to a rain garden or woodland area where it can be absorbed. In addition, building a rain garden together with a swale can effectively reduce runoff and provide a habitat for pollinators and wildlife.
Swales can also be beneficial in landscapes with terraced retaining walls, as they help divert water away from the walls and prevent excessive saturation that could compromise structural integrity.
Anatomy of a Basic Swale
A simple swale typically consists of a shallow ditch with a grass bottom, designed to hold or redirect rainwater as it flows across the lawn. It is commonly used in areas where sloping terrain could lead to erosion if runoff is unchecked. The swale features a wide channel or ditch running horizontally across the slope, with a rounded mound (known as a “berm”) on the downhill side to stop the water from continuing downhill.
During light rainfall, the berm causes the water to pool in the swale, allowing it to be absorbed into the soil. In heavier rains, the water may flow laterally towards a specific area, such as a rain garden, woodland, or landscape pond, where excess water won’t cause any issues.
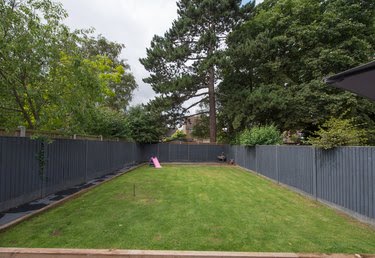
Image Credit:
John Keeble/Moment/GettyImages
Variations in Drainage Swales
A drainage swale can come in different forms. It can be a subtle, almost invisible sloped ditch in the yard, hidden beneath the turfgrass that covers the lawn’s surface. Alternatively, it can be a noticeable decorative landscape feature, such as a dry creek or arroyo filled with smooth stones or gravel, which only fills up with water during rainstorms.
In areas with frequent heavy rainfalls, a more advanced engineering approach may be required for the swale. For instance, the bottom of the swale may be constructed with a layer of gravel and porous drain tile tubing buried beneath the surface. This allows for quicker and more efficient water drainage. This version is sometimes referred to as a “French drain,” and it is often completely concealed when looking across the lawn, as the drain tile is buried and covered with grass. The only visible indication is a slight slope on either side of the swale, guiding rainwater towards the hidden drain tile.
This type of configuration is often used when a house is situated on a slight hill, using French drains to carry roof runoff water from the lawn and downspouts to convenient exit points or catch basins. There are various methods for terminating the drain tile. For example, when drainage is needed for a hillside behind a retaining wall, the buried drain tile may end at a grate near the bottom or side of the wall, providing an easy path for rainwater to escape. The drain tile can also run beneath the lawn and connect to a pop-up fitting located in a rain garden or another low-lying area where the water can be deposited.
One of the most common uses of a drainage swale is to direct runoff water across the lawn towards a rain garden. By learning the steps for this simple project, you can apply the same principles to swale projects of various sizes.
Materials You Will Need
-
Wooden stakes
-
Long 2×4
-
Decorative gravel or rock (as needed)
-
Drain tile and fittings (as needed)
-
Drainage gravel
-
Grass seed, sod, or plants (as needed)
-
Shovel
-
Level
-
Garden rake
How to Construct a Drainage Swale
Step 1: Assess the Slope
The construction of a swale begins with evaluating the slope of the yard and the patterns of water runoff. This analysis helps in planning the route for the swale ditch. One way to determine this is by observing the yard during heavy rainfall, noting where water accumulates and the direction it flows. For instance, if you intend to use the swale to direct runoff water to a rain garden, the rain garden should be positioned at a low point in the yard as the endpoint for the swale.
If you are building a rain garden and there is no natural low spot in your yard, you may need to dig a shallow depression for the planting area. This can be done by hand with a shovel, but larger rain gardens may require hiring a contractor with power equipment. The contractor can also dig the ditch for the swale if desired.
Step 2: Plan the Swale
Once you understand the slope of your yard and how water flows, use wooden stakes to mark the path for the swale ditch. The ditch should start at the entry point for the runoff water, such as a lawn grate under a roof gutter downspout, and end at the rain garden. The goal is to have a funnel-shaped ditch that slopes slightly downward from start to finish, but not too steeply to avoid erosion. On steep slopes, it is generally best to plan the swale so it runs laterally along the slope with a slight downhill pitch, which slows down the flow of water.
If the rainwater runoff in your yard is light, a simple shallow swale ditch that is 1 to 2 feet wide may be sufficient. However, heavier runoff requires a wider and deeper ditch that can hold more water, or the use of a drain tile.
Step 3: Dig the Swale Ditch
Using a shovel, dig a wide, U-shaped ditch from the entry point to the termination point of the swale. If the swale runs laterally along the slope, pile up the excavated soil on the downhill side of the ditch to create a gentle dam that prevents water from flowing past the ditch when it fills with water.
Ensure that the ditch has a slight downward slope from beginning to end by using a long 2×4 with a level to check the pitch. A downward slope of 1/4 inch per foot is usually sufficient.
For a simple swale, use a rake to smooth and shape the berm and ditch, creating gentle curves over the top of the berm and along the bottom of the ditch. You can then proceed to lay new sod or decorative stone over the berm and ditch.
If the swale will have drain tile to handle large amounts of water, excavate the bottom of the ditch to create a deeper trench in the center, where the gravel and drain tile tubing will be placed.
Step 4: Lay Gravel and Drain Tile
If a trench has been dug for drain tile, lay a bed of gravel in the bottom of the trench. Then, lay the drain tile tubing in the trench from the starting point to the ending point. If installing a French drain, use perforated drain tubing. Fill the trench around the tubing with more gravel.
Depending on the type of design you have, you may need to connect drain tile fittings at the start and end of the drain tile. For instance, a drain tile grate is often connected at the beginning of the drain tile below the gutter downspout. The end of the drain tile can be another grate fitting or a pop-up fitting in the middle of the rain garden, which will open and allow water to flow when it rains.
In swales without drain tile, it can also be beneficial to place a few inches of gravel at the bottom of the ditch before covering it with a thin layer of topsoil and sod. This layer of gravel can help with water absorption.
Step 5: Complete the Swale
Finishing the swale involves lining the bottom of the ditch and top of the berm with your choice of landscaping materials. In its simplest form, the ditch and berm can be covered with lawn grass, either by laying sod or planting seeds. This may be the best option for basic swales where you don’t want to draw attention to the feature.
If you want to make the swale a decorative landscape feature, you can line the ditch with decorative stone to resemble a creek bed or arroyo, or you can use the swale as a rain garden by planting it with flowers and shrubs that are well-suited to your area. There are advantages to using the swale as a garden area since it will block and absorb water more effectively than a simple grass-covered swale. It is recommended to choose native shrubs and flowers for planting in rain garden swales as they require less maintenance and attract butterflies and other pollinators to your yard.
However, make sure to select plants that can tolerate wet soil. The term “swamp” in common plant names indicates their preference for wet soil, such as swamp hibiscus (Hibiscus coccineus) and swamp sunflower (Helianthus angustifolius). Both of these plants are native species and are perennials in USDA zones 5 through 9.
