
Quck answer
Installing a video doorbell is a simple process that involves a few steps:
1. Choose a suitable location for your video doorbell, ensuring it has a clear view of your front door.
2. Check if your existing doorbell wiring is compatible with the video doorbell. If not, consider hiring an electrician to install a new wiring system.
3. Turn off the power to your existing doorbell at the circuit breaker.
4. Remove the old doorbell and disconnect the wiring.
5. Follow the manufacturer’s instructions to connect the wiring to your new video doorbell.
6. Attach the doorbell to the wall or doorframe using the provided mounting bracket.
7. Turn the power back on and test the video doorbell to ensure it is functioning properly.
By following these steps, you can easily install a video doorbell and enhance your home security.
Video doorbells have become more affordable and user-friendly, making them a popular choice for homeowners who want to enhance their smart home system. In addition to providing a way to see who is at the door, modern video doorbells offer a range of features such as motion activation, night vision, two-way communication, and remote monitoring through a smartphone or tablet. Installing a video doorbell is a simple task that can be completed in just a few hours with basic tools and a smartphone.
Understanding Video Doorbell Basics
A typical video doorbell consists of a weatherproof button with a built-in camera and motion sensor. Some models also include a two-way speaker. The camera can be powered by a rechargeable battery, connected to existing low-voltage doorbell wires, or plugged into an indoor power source. To transmit video and audio signals to a smartphone or monitoring device, the video doorbell requires a wireless internet connection. It can also send alerts to traditional chime units.
Video doorbells are available in various configurations, ranging from standalone units to comprehensive kits that include additional security sensors, monitoring screens, and indoor chimes. The price varies depending on the features and components included, ranging from under $100 to over $400.
Choosing Between Battery and Hardwired Video Doorbells
The first decision to make when installing a video doorbell is whether to use a battery-operated or hardwired unit. Battery-operated doorbells are a suitable choice for apartment dwellers or situations where hardwiring is not possible. Another option for apartment tenants is a video peephole, which can be easily installed over the existing peephole and offers video recording and two-way communication with visitors at the front door.
Comparison between Cloud Storage and SD Card Storage
One of the main decisions to make is how the system stores the video segments. Hardwired units generally have a more robust storage capability, with some recording video continuously and saving the data to cloud storage. On the other hand, battery-operated units often save shorter videos that are triggered by motion sensors. Video doorbells without cloud storage typically record their video onto a micro SD card that is installed in the doorbell itself. To review the video, you can remove the card and insert it into a computer.
Choice between Free and Subscription Video Storage
It is important to note that video doorbells with cloud storage may require a monthly subscription fee to access all their features. For instance, some doorbells store motion-activated video in the cloud for 60 days before deleting it, but they may charge a fee if you want to review or download the video segments. Other doorbells do not activate cloud storage unless you sign up for a monthly subscription. This additional cost should be carefully considered when purchasing a doorbell, so make sure to read the specifications thoroughly.
Visit Page
https://www.amazon.com
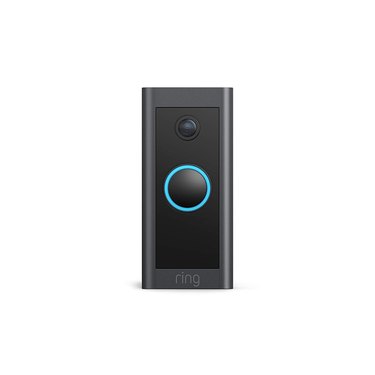
Image Credit:
Amazon
Prominent Manufacturers of Video Doorbells
While there are numerous wireless video doorbell manufacturers, a few companies have emerged as market leaders. It is advisable to consider these manufacturers, as they usually provide excellent customer support and offer user-friendly installation for DIY enthusiasts. Some of the top manufacturers include:
- eufy: Anker Innovations is the owner of eufy, a Chinese company that produces a limited range of high-quality home security devices. These video doorbells are easy to install and do not have any hidden costs. They store videos using an internal SD card. While they may be basic, they are highly functional.
- Samzuy: Despite having a limited product range, Samzuy offers highly rated high-definition video doorbells. These doorbells come with an onboard SD card for video storage and also have the option for cloud storage with a subscription. They provide good performance at a reasonable price.
- Ring: Ring has become synonymous with video doorbells and other home security video devices. They offer video doorbells at various levels, often as kits with additional devices. However, using the video storage and retrieval features of Ring devices requires a monthly subscription, which can be costly in the long run.
- SimpliSafe: Adding a video doorbell to an existing SimpliSafe home security system is a simple task. However, these doorbells are not designed to be installed as standalone units.
- Nest: The Nest video doorbell is designed to be part of the larger Nest home automation system. However, it can also be installed as a standalone unit when paired with a smart device app. These video doorbells are highly regarded but are quite expensive and can only be purchased through Google.
Planning a Video Doorbell Installation
The most convenient and easy-to-maintain installation method for a video doorbell is to power it from an existing low-voltage transformer used for a traditional doorbell. This ensures a constant power source and eliminates the need to recharge batteries. You can determine if your current doorbell is a low-voltage system by unscrewing it slightly from the door casing and checking for attached wires. If there are two wires, it is a low-voltage system.
If there are no wires present, your options are to install a battery-operated video doorbell or one that uses an indoor plug-in power source provided by the manufacturer. DIY installation is straightforward, but you will need to drill holes to run wires to the indoor power supply.
How to Install a Battery-Powered Video Doorbell
Things You’ll Need
-
Battery-powered video doorbell unit
-
Smart devices to run the video doorbell app
-
Dedicated chime unit (may be included with kit)
-
Screwdriver
Step 1: Charge the Doorbell Battery
Prior to installation, fully charge the doorbell battery. This usually involves connecting the doorbell to a power supply using a micro USB cable. You will need to detach the doorbell unit each time you need to recharge the battery. Some models have a removable battery pack that can be taken out for recharging.
Step 2: Mount the Doorbell
For most video doorbells, installation begins with attaching a mounting bracket to the exterior door casing. This is typically done by screwing it in place, but special anchors may be required for stone, brick, or stucco surfaces.
After attaching the bracket, you need to secure the video doorbell unit to the bracket. Most doorbells also come with special security screws that are installed using a screwdriver provided by the manufacturer. This unique design prevents the video doorbell from being stolen.
Step 3: Set Up the Smart Device App
Before the video doorbell can be used, you must download the manufacturer’s app on all devices that will be used to run or monitor the doorbell. This app will establish a connection to your home’s wireless network. In some cases, you may have difficulty connecting to the network, in which case a Wi-Fi extender may be needed to boost the signal.
Once the app is installed, you can customize various settings such as motion activation sensitivity, facial recognition, recording length, and adding two-factor identification for added security. The level of customization will vary depending on the manufacturer, and it may take some time to configure the system to your preferences.
Step 4: Install the Doorbell Chime
If you want your video doorbell to produce an audible chime in addition to sending alerts to your smart devices, you can install a chime unit. This unit may be included in the video doorbell kit or it may be a separate accessory. Typically, the chime unit is a plug-in device that should be mounted in a central location where it can be heard throughout the house.
Once plugged in, you can follow the instructions in the smart device app to pair the chime unit with your doorbell. You can also choose the desired chime tone.
Visit Page
https://www.amazon.com
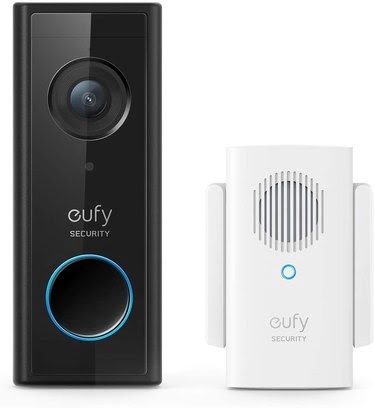
Image Credit:
Amazon
How to Install a Hardwired Video Doorbell
Things You’ll Need
– New 16- to 24-volt transformer (if needed)
– Indoor chime unit (optional)
– Video doorbell unit
– Smart devices to run the video doorbell app
– Multimeter (if needed)
– Screwdrivers
– Drill and bits (if needed)
Step 1: Shut Off Power to the Doorbell Transformer
Even though doorbells operate on a low-voltage system that is not capable of producing serious shocks, it is recommended to turn off the circuit breaker that powers the doorbell transformer. To confirm that you have switched off the correct circuit breaker, test the doorbell. If the power is off, the doorbell will not chime.
Step 2: Find and Inspect the Transformer
The power supplied by the transformer must be suitable for the new video doorbell, typically ranging from 16 to 24 volts. While you can usually trace the thin low-voltage wires that lead from the doorbell or chime unit, locating the transformer can be challenging. Sometimes, these transformers are attached to the side of the main service panel, or they may be connected to a junction box near the doorbell chime unit.
The voltage of the transformer is usually indicated on the unit itself. If there are no markings, you can use a multimeter tool to measure the voltage. If the old transformer does not meet the 16- to 24-volt requirement, you can replace it with a new transformer that is compatible with the video doorbell.
Step 3: Examine and Modify the Chime Unit
Locate your chime unit and uncover it to determine whether it is a mechanical or digital chime. Mechanical chimes use a small hammer to strike a chime tube, while digital chimes are essentially small electronic speakers. It is usually easy to tell which type you have once you remove the cover.
Follow the instructions provided by the video doorbell manufacturer to adapt your current chime for the new doorbell. In some cases, no modifications are necessary, but with digital chimes, you may need to install a special adapter or diode where the wires from the doorbell are connected. If your chime unit does not work with the new video doorbell, it is relatively simple to disconnect it and install a new chime unit specifically designed for your video doorbell brand.
Step 4: Remove the Old Doorbell
Unscrew the old doorbell from the case molding next to the entry door and then disconnect the two wires located on the back of the doorbell. Take care to prevent them from slipping into the opening; securing them to the molding with tape can help avoid this.
Step 5: Install the Video Doorbell
Attach the mounting bracket for the new video doorbell to the case molding over the doorbell wires using the screws provided. Once the mounting bracket is in place, carefully connect the doorbell wires to the terminals on the back of the video doorbell unit. Then, attach the doorbell to the mounting bracket.
Finish by securing the security screws, which have a unique design and require the provided tool to drive them. These screws make it difficult for the doorbell to be stolen.
Tip
If you are installing a hardwired video doorbell but do not already have a low-voltage wired system, you will need to drill holes and run wires from the doorbell to an indoor power supply provided by the manufacturer. This will require a drill and twist bits.
Step 6: Install the Doorbell App
Turn on the power to the system and then download the video doorbell app from the manufacturer onto any smart devices you plan to use with the video doorbell. Follow the app’s instructions to pair the system with your Wi-Fi network and then proceed with the customization process. This may include adjusting the motion-sensor sensitivity, setting the length of recorded videos, recording a welcome message, and detecting packages left on your doorstep. The app instructions will also guide you on how to subscribe to video storage or alert services. It is also recommended to enable two-step authentication if the system offers this feature.
