Quck answer
Caulking against brick is a simple process that helps to seal gaps and prevent moisture and drafts from entering your home. Here are the steps to caulk against brick:
1. Clean the area: Remove any loose debris or dirt from the brick surface using a wire brush or pressure washer.
2. Choose the right caulk: Select a high-quality silicone or polyurethane caulk that is specifically designed for outdoor use and can withstand extreme temperatures.
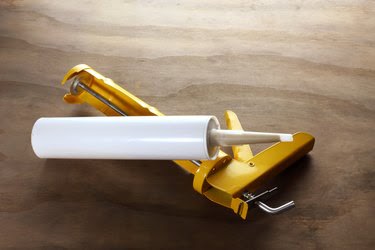
3. Prep the caulk gun: Cut the tip of the caulk tube at a 45-degree angle and load it into the caulk gun.
4. Apply the caulk: Hold the caulk gun at a 45-degree angle and dispense a thin bead of caulk into the gap between the brick and the adjacent surface.
5. Smooth the caulk: Use a caulk smoothing tool or your finger to smooth and shape the caulk, ensuring it fills the gap completely.
6. Clean up: Wipe away any excess caulk with a damp cloth before it dries.
By following these steps, you can effectively caulk against brick and improve the energy efficiency and appearance of your home.
Caulking plays a crucial role in any home improvement project as it helps prevent moisture and air from entering the interior of buildings. When it comes to sealing the gaps between different materials like wood and brick, exterior caulk is commonly used. However, applying caulk on a brick surface requires careful execution to avoid excess caulk spreading over the brick. By following the correct technique, you can achieve a clean and professional-looking seal.

How to Properly Apply Caulk on Brick Surfaces
Image Credit:
sunstock/iStock/GettyImages
Select the Right Caulk
For brickwork, it is essential to choose a caulk that dries clear. Silicone caulk or butyl-rubber caulk are ideal for outdoor areas as they can withstand exposure to rain, sunlight, and other elements. Latex caulk and expandable foam caulk are not recommended for outdoor use. If you’re a beginner, opt for a paintable silicone caulk that initially appears white but dries to a clear finish. This way, any excess caulk mistakes will be virtually invisible.
Prepare the Caulk for Application
Pick a day with no rain in the forecast and an outdoor temperature above 40 degrees. Different caulks have specific temperature requirements, so refer to the instructions on the caulk tube. Use sharp scissors or a knife to cut 1/4 inch off the end of the caulk tube at a 45-degree angle.
Insert the caulk tube into a caulk gun and twist the top part of the gun clockwise until it securely fits against the bottom of the caulk tube. Some caulk tubes have a spring mechanism, allowing you to pull back the rear portion instead of twisting it.
Perform a Small Test Patch
Before proceeding with the entire project, select a discreet spot to test the caulk. Hold the caulk gun at a 45-degree angle against the brick surface. Squeeze out a small amount of caulk onto the test patch and smooth it into place. If you’re satisfied with the appearance, you can use this technique for the rest of the project.
Apply Caulk to the Bricks
Press the trigger of the caulk gun and apply a layer of caulk along the brick surface in one continuous motion. When you reach the end of the area, release the trigger to stop the flow of caulk.
Place your finger over one end of the caulk line and gently press down. Run your finger along the entire length of the caulk line to smooth it out and create a professional-looking finish. This also helps push the caulk into any small crevices.
Paint Over the Caulk
Once the caulk has completely dried (refer to the packaging for recommended drying times), you can paint over it if needed. Use the same color of paint that was used on the material adjacent to the brick. Using a small craft paintbrush dipped in paint will make painting the caulk much easier.


