
Quck answer
To repair a drawer track and slides, follow these steps:
1. Remove the drawer from the cabinet by pulling it all the way out.
2. Inspect the drawer slides for any damage or wear. If they are bent or broken, replace them with new ones.
3. Clean the drawer slides and tracks with a damp cloth to remove any dirt or debris.
4. Apply a lubricant, such as silicone spray or wax, to the drawer slides and tracks to ensure smooth operation.
5. If the drawer track is loose or damaged, use screws or nails to secure it back in place or replace it if necessary.
6. Test the drawer by sliding it in and out to ensure it moves smoothly along the track.
By following these steps, you can easily repair a drawer track and slides, restoring functionality to your drawer.
Drawers endure a lot of abuse and are often mistreated and overloaded. The hardware is somewhat fragile, with small wheels, rollers, and bearings that wear out and need to be replaced. Luckily, manufacturers offer replacement slides for almost every situation. However, before you rush to the hardware store to buy brand-new tracks for sticky drawers, try adjusting the track screws.
The key to smoothly pulling drawers is knowing how to use the adjusting screws, located in oval holes on the tracks. If the drawer rubs, sticks, or is too tight, loosen the screws and gently move the drawer or track up, down, left, or right as needed, then test it again. Once the drawer glides smoothly, tighten the screws to secure the track in place. But if this still doesn’t yield satisfactory results, you may need new hardware. First, determine whether your drawers have bottom-mount or side-mount slides.
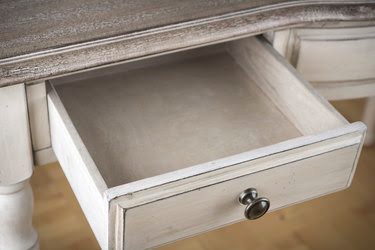
Image Credit:
didecs/iStock/GettyImages
Bottom-Mount Slides
Bottom-mount drawer slides are attached to the bottom of the drawer, while the tracks are attached to the cabinet. Bottom-mounts come in two configurations: the most common one is bent at a 90-degree angle and fits over the edge of the drawer. The other type of bottom-mount is flat and, despite attaching to the side at the bottom, is still considered a bottom-mount because the corresponding track attaches to the bottom of the drawer.
An economy version of the bottom-mount has only one mount, centered on the drawer or cabinet. It may or may not have a matching track, but instead features a simple wheel that fits into the track. This type is typically found in production or affordable cabinets and desks with lightweight drawers.
Most bottom-mount guides use nylon wheels, which will eventually wear out. The wheels are usually attached to the drawer slides and fit into channels on the cabinet slide. You can easily identify a nylon roller: it’s typically extended at an angle at the back end of the slide on the drawer.
Side-Mount Slides
Side-mount slides extend to pull the drawer out further than a bottom-mount slide. They attach to the sides of the drawer and cabinet and are usually capable of supporting more weight than a bottom-mount. Side-mount slides typically attach in the center of the drawer, but other styles, such as the European side-mount, attach to the side of the drawer at the bottom. However, these should not be confused with bottom-mounts, which do not extend.
Keep in mind that it’s challenging to switch from a bottom-mount to a side-mount or vice versa. It can be done, but it requires significant modifications to the cabinet and drawer.
The ball-bearing rollers commonly used with side-mount slides are more efficient than nylon wheels. The ball bearings are typically located inside both of the corresponding slides.
Note that wheels and bearings cannot be repaired, and replacement parts for them are usually unavailable.
Replacing Slides: Do Your Research
Before attempting to replace the slides, remove one of the drawers and determine the type and size you need. If you’re unsure, unscrew the slide from the drawer and bring it with you to the hardware store to compare it to the floor models.
If you buy slides from the same manufacturer as the original ones, the screw holes in the cabinet and drawer are more likely to align with the drilled holes in the slides. If not, the slides will still work, but the screw holes may not align.
Slides are sold and repaired as a set, and they are not available separately. When you make a purchase, you will receive a kit with four coordinated slides.
Removing Slides From Cabinets
Most under-mount slides can be pulled out to release the drawer from the cabinet. You may need to jiggle the drawer to get it to release. Most side-mount slides have a lever or tab halfway along the slide that can be used to release the drawer when it is in the open position.
Replacing Slides and Tracks
Remove the drawer from the cabinet. Use a drill or screwdriver to remove all the screws from each slide, and check the length and type of screws used. Get a kit with four new slides that match the ones you removed.
Take the four pieces out of the packaging. Look for the installation stamps. The slide marked “DL” should be installed on the left side of the drawer. The slide marked “DR” should be screwed to the right side of the drawer. The slide marked “CL” should be screwed to the left side of the cabinet opening. The slide marked “CR” should be screwed to the right side of the cabinet opening.
Separate the two slides marked “DL” and “DR” and screw them to their respective locations on the drawer using a drill/driver and the screws provided. There are two oval-shaped holes at each end. Insert screws into them, but only tighten them lightly as they are adjustment screws.
Separate the remaining two slides. Screw the slide marked “CL” to the left side of the cabinet on the inside. Screw the slide marked “CR” to the right side.
Slide the drawer in and out of the cabinet. If it doesn’t slide smoothly, loosen the screws in the oval-shaped holes, move the drawer in the necessary direction, test again, and repeat if needed. Tighten the screws when the drawer glides smoothly.
