

Quck answer
When choosing a ceiling fan electrical box, there are a few key factors to consider. First, make sure the box is rated for ceiling fan installation, as it needs to support the weight and movement of the fan. Look for a box that is labeled as “fan-rated” or “heavy-duty.” Next, consider the installation method. There are two main types: surface mount and ceiling fan brace. Surface mount boxes are easier to install but may not be as sturdy. Ceiling fan brace boxes require additional steps but provide a more secure installation. Finally, ensure the box is compatible with your ceiling type (e.g., joist or concrete).
When installing a ceiling fan, it is important to choose the appropriate electrical box to provide the necessary support. According to the National Electrical Code, ceiling fans weighing 35 pounds or more must be installed on a ceiling fan-rated electrical box. It is also recommended to use a fan box for lighter fans due to the torque and vibrations they generate.
A ceiling fan box differs from a light fixture box as it requires support from a joist. It is easier to install the box before the ceiling drywall is in place. For new construction, a new-work box with a support bracket that screws to adjacent joists can be used. However, if replacing a light fixture or using a light fixture box for an existing fan, an old-work box can be used. This box is either screwed directly to the joist or has a tension bar that fits between two joists.
While some ceiling fan manufacturers include the electrical box in the fan packaging, others do not, requiring a separate purchase. Fan-rated boxes from brands like Raco and Legrand can be found at electrical supply retailers. Here are some tips for selecting the right ceiling fan box.
Choosing Ceiling Fan Boxes
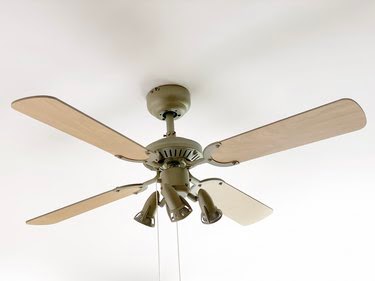
Image Credit:
gerenme/iStock/GettyImages
Ceiling fan electrical boxes are typically made of metal for added strength, although durable plastic options like PVC are also available. These boxes are always round or octagonal in shape, rather than rectangular. Two types of boxes are commonly used: new-work and old-work boxes.
New-Work Box
A new-work box is suitable for ceilings that have not yet been drywalled, as it can be screwed to the joists. Some side-mount models have a single tab for screwing to the side of a joist, while hanger-style boxes have two arms that extend between a pair of joists and are screwed to both of them. The choice depends on the fan’s position relative to the joists.
Old-Work Box
When installing a fan in a ceiling with existing drywall, the type of old-work box needed depends on the fan’s position relative to the joists. If the fan is directly above a joist, a ceiling pan box or a saddle box can be used. Both boxes are screwed directly to the joist from underneath, but a pan box is shallow, providing just enough space for the wires. If more working room is required, a saddle box with extended sides can be chosen. Both types of boxes can also be used for new construction projects.
When the fan is mounted between the joists, a retrofit bracing bar is needed instead of a new-work box if there is no attic access. This retrofit bracing bar functions like a tension bar for a shower curtain. It is inserted through the hole in the ceiling, twisted to extend the ends until they clamp against the joists, and then the box is attached to the tension bar using the provided bracket.
Adding Weight to Ceiling Fans through Spinning
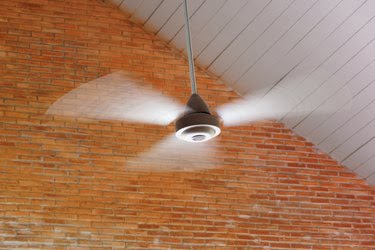
Image Credit:
Ratchat/iStock/GettyImages
A ceiling fan typically weighs between 15 and 35 pounds, depending on the length of the blades and the presence of a light kit. However, when the fan is spinning, the continuous torque it applies to the electrical box adds extra weight. Although this difference is not always easy to measure, an estimated additional weight of 15 to 20 pounds can be expected. Therefore, a fan that weighs 20 pounds when stationary exerts a force of approximately 35 to 40 pounds when spinning.
Calculating this difference is not necessary when purchasing a ceiling box because the manufacturer has already taken it into account. Fan-rated ceiling boxes are usually designed to handle a maximum load of 70 pounds, which is significantly more than the dead weight of most fans. Only extremely large or heavy fans require heavy-duty boxes with higher load ratings.
Is a New Ceiling Fan Box Required?
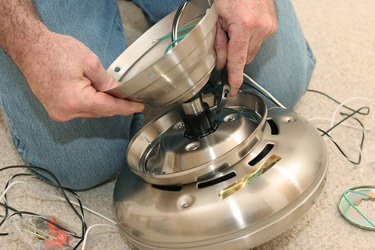
Image Credit:
lisafx/iStock/GettyImages
When replacing a light fixture with a ceiling fan, it may not be necessary to install a new ceiling fan box, especially if the light fixture is heavy. On the other hand, if there is an existing ceiling fan mounted on a box that is not fan-rated, the box needs to be replaced. A fan mounted on an insufficient box can fall.
A preliminary test for a fan-rated box involves trying to wiggle it after removing the light fixture or fan. A fan-rated box, secured to the joists, should not move, whereas a light fixture box mounted only to the ceiling may have significant play or easily push in on one side. After conducting this test, check for a label inside the box. It should indicate that the box is “acceptable for fan support” or something similar, and it should specify the maximum weight of the fan it can support. If attic access is available, the box can be inspected for fixture support (braces or tabs holding it to the joists) and a label, which may be affixed to both the inside and outside of the box.
Steps for Installing a Ceiling Fan Box

Image Credit:
Pawel Kajak/iStock/GettyImages
In addition to supporting the fan, a ceiling box also acts as a junction box for the electrical wires. Therefore, there are knockout holes for the wires on the back of the box. Nonmetallic cable clamps should be fitted into these holes to protect the wiring, which should then be fed into the box before attaching the box to the joists.
Here is the procedure for installing a new-work ceiling fan box:
- If the new box has a tab, screw it to a joist or extend the hanger to touch the joists on both sides and screw it to the joists. If there is attic access, this can be done from above even if the ceiling is drywalled.
- Place the box in position and tighten the nuts that hold it to the hanger.
Here’s how to install an old-work ceiling fan box between joists:
- Insert the bracing bar through the hole in the ceiling.
- Rotate the bar to lengthen it and wedge it into place.
- Position the box and tighten the screws or nuts to secure it. Different manufacturers may have slightly different installation processes, so make sure to read the instructions provided with your box.
- Once the box is secure, you can proceed with wiring the fan, making sure to cap all wire splices with appropriate connectors. Secure the fan to the box using the mounting screws that come with the fan.
Using the correct screws is crucial. The screw size and thread count required to meet the load rating of the box are often specified by ceiling fan boxes. Using the wrong screws can jeopardize the installation, regardless of the box’s strength or how securely it is mounted. Inadequate screws can break or shear off due to the weight and motion of the fan.
Verify that the screws provided with your fan meet the screw specifications indicated on the box. If you need replacement screws, ensure that you get the appropriate type for the box. A commonly recommended screw is a 10-24 machine screw with 24 threads per inch.
Tip
When installing an old-work box, you may need to remove an existing fixture box first. The easiest way to do this yourself is to use a block of wood and a hammer to pound it out. However, in some cases, you may have to cut a notch in the drywall to expose the fasteners holding the box to the joists and cut those fasteners using a reciprocating saw or a hacksaw blade. If the old box is mounted over a joist and not recessed into the drywall, you can simply unscrew it and screw the new box in the same position.
