
Quck answer
To install a pocket door, follow these steps:
1. Measure and mark the opening: Measure the width and height of the door opening and mark it on the wall.
2. Remove existing door and frame: Remove the existing door, trim, and frame from the opening.
3. Install the pocket door frame: Attach the pocket door frame to the studs using screws.
4. Install the track and rollers: Install the track and rollers onto the top of the door frame.
5. Hang the door: Hang the door onto the rollers and adjust it to ensure smooth operation.
6. Install the door guides: Install the door guides at the bottom of the door to keep it aligned.
7. Add trim and finish: Install trim around the door opening and finish it with paint or stain.
Following these steps will help you successfully install a pocket door.
A pocket door, a space-saving alternative to traditional passage doors, is gaining popularity as homeowners seek to customize their interiors. While hiring a professional contractor is an option, motivated DIYers can tackle the installation themselves. However, it’s important to note that this is a challenging DIY project, so if you’re not confident in your skills, it may be best to hire a pro.
While it’s possible to complete the entire installation using your own framing lumber and a table saw, using a store-bought pocket door kit that includes a new door, track, and necessary hardware will make the process much easier. Alternatively, you can reuse your existing door and purchase the pocket door frame and track separately.
Factors to Consider Before Installing a Pocket Door
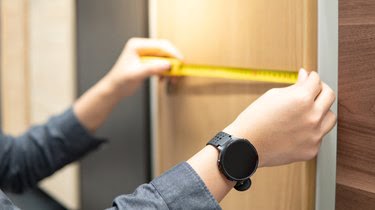
Image Credit: Zephyr18/iStock/GettyImages
Before you begin the installation, there are a few key factors to consider:
1. Is the Wall Load-Bearing?
If the wall is load-bearing, you’ll need a header that spans the entire distance above the door. Consult with a contractor or structural engineer to determine the appropriate header dimensions. Additionally, check with your local building department to see if you need a permit for modifying a load-bearing wall.
2. Are There Obstructions?
Ensure that the wall where the pocket door will slide into is free of any electrical wires or plumbing pipes. If there are obstructions, it may be necessary to opt for a different type of door.
3. Consider Privacy and Soundproofing
Keep in mind that pocket doors are not ideal for rooms that require privacy or soundproofing. They work best for areas like pantries, hallways, closets, and living room entryways, but may not be suitable for bedrooms or bathrooms.
Step-by-Step Guide to Installing a Pocket Door
Visit Page
https://go.skimresources.com
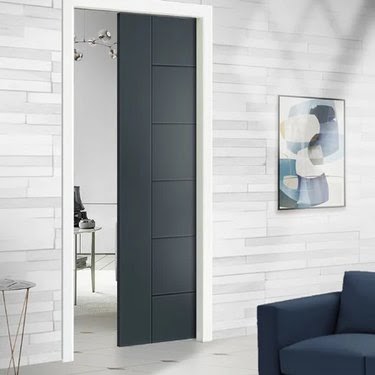
Image Credit: Wayfair
What You’ll Need:
-
Non-contact voltage tester
-
Flat bar
-
Reciprocating saw
-
Pocket door installation kit
-
Pocket door
-
Level
-
Wood for door header
-
Joint compound
-
Door casing
-
Pocket door latch (optional)
If you are planning to install a pocket door yourself, follow these instructions to ensure proper installation. Alternatively, if you decide to hire a professional, they will likely follow this same process.
Step 1: Remove the Drywall and Existing Door Jambs
While it is possible to install a pocket door by simply removing the drywall from one side of the wall, it is easier if you open up both sides of the wall.
- Before cutting into the drywall, use a non-contact voltage tester to check for electrical wires and mark their positions to avoid accidentally cutting through them.
- Instead of only cutting an opening for the pocket door, remove the drywall from the entire wall, from ceiling to floor.
- If there are any pipes or wires in the way, either reroute them or hire a plumber or electrician to do so.
- Start by removing the existing door casing from the floor.
- Use a flat bar to pry off the side jambs, followed by the top jamb, to expose the studs framing the rough opening.
Step 2: Remove the Studs
- Using a reciprocating saw, cut through the fasteners holding the studs to the top plate of the wall.
- Once the tops are free, tilt the stud towards you and pull it off the nails holding it to the bottom plate. If the studs are screwed on, you will need to cut through the screws as well.
- Remove all the studs that intersect the space where the door will be installed.
Step 3: Remove the Existing Header
On the pocket side of the door opening, there are two studs joined together: a jack stud to support the header and a king stud behind it that spans from the top to the bottom plate.
- Detach the header from the jack studs on both sides of the doorway and remove it.
- Pry out the jack stud/king stud pair from the pocket side of the door.
Step 4: Install a New Header
To support the new header, you will need a new jack stud/king stud pair. The height of the jack stud must match the height of the existing jack stud on the opposite side of the doorway. Refer to the frame manufacturer’s instructions, as they may require longer jack studs than the ones you currently have. In that case, you will also need to replace the jack stud in the door opening.
- Place the new king stud/jack stud pair in position so that the face of the jack stud is a distance of twice the width of the door plus an inch from the face of the opposing one. Make sure to refer to the installation instructions provided with your kit, as the required distance may vary slightly.
- Use screws to secure the king stud to the top and bottom plates of the wall, ensuring it is straight by using a level to plumb it first.
- Cut a new header to fit between the king studs. Place it on top of the jack studs and check for levelness. If necessary, insert shims under the low end and then secure the header to the studs with screws.
- To complete the installation, insert cripple studs (short studs that can be cut to size) between the header and top plate at 16-inch intervals.
Step 5: Mount the Pocket Door Frame
Most pocket door kits come with brackets that can be used to fasten the frame to the stud and bottom plate.
- Position the frame in the wall opening and secure it to the jack stud in the pocket and the bottom plate. If the pocket jack stud is correctly placed, the split stud in the door opening will align with the end of the bottom plate.
- Ensure that this stud is plumb by using a level before attaching it to the bottom plate and header using the provided brackets.
Step 6: Mount the Upper Track
- Attach the upper portion of the frame, which extends between the jack studs, to the header using screws.
- Screw the track onto this section of the frame, ensuring that the track remains centered within the frame for its entire length.
Step 7: Install the Hangers and Hang the Door
- Follow the manufacturer’s instructions to install the door hangers on the top of the door.
- Hang the door on the track.
- Verify that the door hangs straight by opening it fully into the pocket to ensure that the edge aligns with the split stud in the doorway. Then, close it to confirm smooth gliding.
- Install a jamb on the side of the door where it closes. Without this trim piece, the door opening will be too wide. Close the door again to ensure that it completely covers the door opening.
- If desired, add trim to the top of the frame to conceal the track. This trim may be included in the kit.
Step 8: Cover the Wall With New Drywall
- Secure new drywall over the exposed wall, using 1 1/4-inch drywall screws to attach it to the wall studs and pocket door frame. Using longer screws may cause them to penetrate the nailer or intermediate studs and scratch the door.
- Apply tape and joint compound to finish the drywall before installing door casing and hardware.
Step 9: Install Door Casing and Door Hardware
- Adorn the door opening with door casing, painting it as desired.
- If not already present, install a thumb hook on the edge of the door to facilitate pulling the door when it is inside the pocket. Pocket door kits typically include these hooks along with installation instructions.
- You can also install a latch for added security, which can be purchased separately.
