

Quck answer
Installing a dishwasher can be done in a few simple steps. First, gather all the necessary tools and materials, including a dishwasher installation kit. Next, shut off the water supply and disconnect the power. Remove the old dishwasher if necessary. Then, connect the water supply line and the drain hose to the new dishwasher. Finally, plug in the power and turn on the water supply. Test the dishwasher to ensure it is working properly. Following these steps will allow you to successfully install a dishwasher in your home.
Whether you are a first-time dishwasher installer or replacing an old one, this DIY project requires some plumbing, electrical, and carpentry skills. Before starting, ensure you have an alcove next to the kitchen sink that meets the standard dishwasher dimensions of approximately 24 inches wide, 24 inches deep, and 35 inches high. If not, you may need to make some adjustments to the existing cabinets.
If you already have the alcove ready and it is not occupied by an old dishwasher, here are the steps you need to follow:
- Connect the water supply
- Attach the drain hose to the sink drain tailpiece or garbage disposal
- Make the electrical connections
- Level, place, and secure the dishwasher to the countertop
Most necessary parts should come with the dishwasher, but you may need to purchase a flexible water hose with the correct connections and ensure there is a nearby 120-volt outlet for the power cord. Alternatively, if your previous dishwasher was hard-wired, you can simply connect the existing electrical cable to the new unit.
Electrical Wiring Requirements for Dishwashers
For safety reasons, the electrical code mandates that the outlet used for the dishwasher installation must have AFCI (arc fault circuit interrupter) and GFCI (ground fault circuit interrupter) protection if it is within 6 feet of the kitchen sink. It is recommended to have an electrician install an AFCI/GFCI outlet or breaker to ensure compliance with code. If you choose to install an outlet, place it on the reverse side of the cabinet frame for easy access.
If you have a garbage disposal and both the dishwasher and disposal will use a cord and plug, it is advisable to connect them to the same receptacle if permitted by local codes. In this case, a 20-amp outlet capable of handling the current draw from both appliances simultaneously is required.

Image Credit:
Stephen Paul for Hunker
Understanding the Air Gap and its Importance
One potential issue when connecting the dishwasher drain hose to the sink drain tailpiece or garbage disposal is the risk of contaminated water flowing back into the dishwasher during a drain backup. To prevent this, an air gap, which is a dome-shaped fitting installed on the kitchen sink drainboard, is used. The dishwasher drain line connects to the inlet port, the sink drain connects to the outlet port, and there is a small vent opening between the two.
In addition to being an unsightly addition to the appearance of your kitchen, an air gap also has the annoying tendency to release water whenever the dishwasher is draining, which is disliked by both homeowners and plumbers. Fortunately, many state and local plumbing authorities allow for an alternative solution. This involves looping the dishwasher drain line as high as possible inside the sink cabinet before connecting it to the kitchen sink drain.
Due to the fact that dishwasher manufacturers are increasingly incorporating anti-siphon mechanisms in their products, some plumbing authorities are relaxing the requirements for air gaps. However, others are actually strengthening these requirements. The American Society of Home Inspectors has reported that Minnesota added an air gap requirement to the state plumbing code in 2016, so it is not safe to assume anything. It is important to check with your local plumbing authorities to confirm the regulations in your area.
Items You Will Need
-
Double-port shutoff valve
-
Drain tailpiece with dishwasher port
-
Drain hose
-
Hose clamps
-
Water supply hose
-
Power cord
-
1-inch screws
-
Hose bracket
-
Wire nuts
-
Locking pliers
-
Drill
-
Hole saw or spade bits
-
Adjustable wrench
-
Screwdriver
-
Level
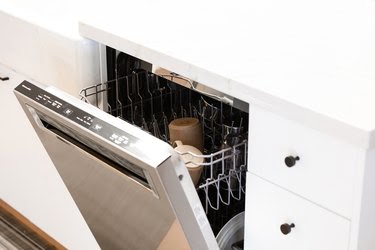
Image Credit:
Stephen Paul for Hunker
How to Install a Dishwasher
Step 1: Install a New Hot Water Shutoff Valve
To begin, turn off the cold water inlet valve on the water heater and open the hot water port of the kitchen faucet in order to relieve pressure and drain the line. Use locking pliers to disconnect the water supply line from the shutoff valve. Remove the valve and replace it with a double-port shutoff valve. Use pliers to tighten the compression fitting; no Teflon tape is needed. Connect the faucet water line to one of the ports on the new valve, leaving the other port for the dishwasher. Turn the water on to check for any leaks, but keep the valve in the off position for now.
Step 2: Drill Holes for the Drain Hose and Power Cord
Next, use a drill and a spade bit or hole saw to drill a 1 1/2-inch hole in the wall between the dishwasher alcove and the sink cabinet. This hole is for the dishwasher drain hose. It is recommended to drill this hole as close to the countertop as possible, as it will make creating a loop or connecting to the air gap easier. You may also want to drill a separate 1-inch hole for the water line, although it is possible to pass both hoses through the same hole if that is more convenient. However, a separate hole is necessary for the power cord, and it should be large enough to accommodate the plug, which is typically around 3/4 inch in size.
Step 3: Prepare the Sink Drain
If you are installing a new dishwasher, replace the tailpiece on the sink drain with one that has a port for the dishwasher hose. If you are replacing an existing dishwasher, the drain should already have this fitting. If you are connecting the dishwasher to a garbage disposal, make sure to disconnect the power and remove the plug on the garbage disposal drain port, if it has not already been removed.
Step 4: Install an Air Gap If Necessary
If an air gap is required, install it in a predrilled hole either on the sink deck or on the countertop. If you choose to install it on the countertop, make sure it is close enough to the sink so that any water that spits out will not end up on the countertop surface.
Step 5: Prepare the Dishwasher
Position the dishwasher horizontally and attach the drain hose to the drain port, securing it with a hose clamp. Connect the water supply line to the water inlet and tighten the connection using pliers or a wrench. Attach the power cord to the electrical terminals, tighten all the connections with a screwdriver, and then attach the cover plate.
Step 6: Move the Dishwasher Into Position
Stand the dishwasher upright and gently move it towards the designated area while feeding the drain hose, water line, and power cord through the appropriate holes. As you gradually slide the dishwasher into place, continue pulling the hoses and cords through. It may be helpful to have someone assist you with this step.
Before pushing the dishwasher fully into place, adjust the rear leveling feet so that the top is approximately 1/2 inch away from the countertop. Once the dishwasher is in position, open the door, place a level on the floor, and adjust the front feet to ensure that the appliance is level. Once it is level, secure it to the underside of the countertop using two provided brackets and 1-inch screws.
Step 7: Connect the Drain Hose
If an air gap is present, attach the hose to the inlet port of the air gap and secure it with a hose clamp. Connect the air gap to the drain tailpiece or garbage disposal using a second length of hose, securing both ends with hose clamps.
If the dishwasher installation does not require an air gap, secure the drain hose to the underside of the countertop using a hose bracket before connecting it to the tailpiece or disposal.
Step 8: Hook Up the Water
Attach the water hose to the available port on the hot water shutoff valve and tighten the connection using pliers or a wrench. Turn on the shutoff valve and inspect for any leaks. If you notice any leaks, tighten the connection further to stop them.
Step 9: Connect the Power
If the dishwasher has a plug, simply plug it in. If it requires hard-wiring, connect the circuit wires to the wires inside the dishwasher’s electrical box, following the wiring diagram provided by the manufacturer. Use wire nuts to make the connections. Remember to reinstall the cover plate on the electrical box to ensure that the wire connections are not exposed.
