

Quck answer
To paint a kitchen tile backsplash, follow these steps:
1. Clean the tiles thoroughly with a degreaser to remove any grease or dirt.
2. Sand the tiles lightly to create a rough surface for better paint adhesion.
3. Apply a primer specifically designed for tiles to ensure proper paint adhesion.
4. Use a paintbrush or a roller to apply a coat of paint in your desired color.
5. Allow the paint to dry completely before applying a second coat if needed.
6. Once the final coat is dry, seal the painted tiles with a clear, water-resistant sealer to protect the paint.
7. Enjoy your newly painted kitchen tile backsplash!
Remember to choose a paint that is suitable for high-moisture areas and to follow the manufacturer’s instructions for drying times and application methods.
Updating outdated tile can be a challenging task. The expenses of hiring professionals and buying materials can quickly add up, especially if you have an older home that may require asbestos removal. However, you can transform your drab and dreary tile with just $30 and some paint. With attention to detail, the right materials, and a little elbow grease, you can give your tile a fresh and bright look.
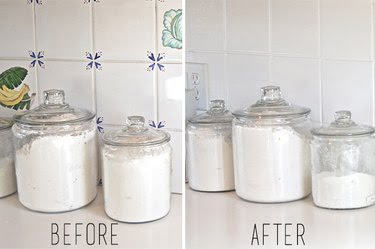
Image Credit:
Charlotte Smith
Necessary Supplies
- Refinishing epoxy for tub and tile (Rustoleum brand recommended)
- Abrasive cleaner like Comet
- Steel wool
- Tack cloth (optional)
- Cleaner for stripping waxy build-up
- High-quality low nap roller
- Protective respirator mask for fumes
- Painter’s tape

Image Credit:
Charlotte Smith
Step 1: Remove Switch Plates
Prior to painting, take off any switch plates and keep track of the screws.
Image Credit:
Charlotte Smith
Step 2: Thoroughly Clean
Start by scrubbing the tile with the abrasive cleaner. Rinse. Then, use steel wool to go over the tile. Rinse again. Finish by rubbing down with the wax build-up cleaner. The objective is to eliminate any greasy residue or grime that may have accumulated on the tile.
Image Credit:
Charlotte Smith
Step 3: Tape Off the Area
Protect your countertop, cabinets, or trim that comes into contact with the tile. Use painter’s tape to outline the area to be painted, ensuring that the tape edges are sealed by running a flat edge, like a credit card, over them.

Image Credit:
Charlotte Smith
Step 4: Tack Cloth
Immediately before painting, wipe the tile with a tack cloth to remove any fine dust and debris.
Step 5: Apply Paint
If the paint requires mixing, follow the instructions on the container. The brand used in this example required a mixture of four parts base paint to one part activator, and it remained usable for only six hours after mixing.
Using a high-quality roller with a thin nap, apply the paint to the tile. Be cautious not to go over the epoxy too frequently, as it may cause the roller to lift off the previously applied paint. Pay attention to any drips or lines created by the roller edge.
Image Credit:
Charlotte Smith
Step 6: Apply Another Coat (Optional)
Check the specific guidelines for your brand before applying a second coat of paint. For particularly dark tiles, a third coat may be necessary. Once again, follow the instructions, as a third coat may require up to 72 hours of drying time before applying.
Image Credit:
Charlotte Smith
Do not use paint on floor tiles, as they will become slippery. However, you can apply paint to tile in any other area of your home.

Image Credit:
Charlotte Smith
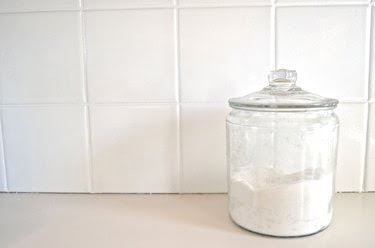
Image Credit:
Charlotte Smith
This project can be completed in one afternoon and will instantly brighten your kitchen. The old 70s tiles will be transformed into a neutral and bright white, giving the entire kitchen a more modern and up-to-date feel.
Image Credit:
Charlotte Smith
