

Quck answer
To remove and replace a shower drain, follow these steps:
1. Gather the necessary tools: pliers, screwdriver, putty knife, and a new shower drain.
2. Remove the drain cover by unscrewing it or prying it off with a screwdriver.
3. Use pliers to unscrew the drain assembly from the shower pan or pipe.
4. Clean the area around the drain hole using a putty knife to remove any old putty or debris.
5. Apply plumber’s putty around the new drain’s flange and insert it into the drain hole.
6. Tighten the drain assembly with pliers until it is secure.
7. Replace the drain cover and test for any leaks.
Remember to turn off the water supply before starting the process and consult a professional if you are unsure or uncomfortable with completing this task.
The most common and immediate reason for removing and replacing a shower drain is to fix a leak, which is typically indicated by water damage to the drywall in the ceiling below the shower. Of course, you also need to replace the shower drain if you want to replace the shower pan or base. Additionally, if your old shower drain is showing signs of corrosion, it is advisable to replace it to prevent future leaks. This task, like many DIY plumbing tasks, is easier said than done due to corroded fittings and limited working space.
When a bathtub drain leaks, you can usually repair it from inside the bathtub. However, a shower drain is not constructed the same way, so you should be prepared to cut into the ceiling below the shower to properly fix the problem. If your bathroom is on the ground floor, you may need to access the crawlspace under the bathroom. As any plumber who has replaced an old faucet can attest, removing corroded fittings and tightening new ones to prevent leaks requires extra strength and dexterity, especially when working in tight spaces. Therefore, it is recommended to give yourself as much room as possible by cutting a larger hole than initially anticipated. Don’t worry — patching a large hole in a drywalled ceiling is no more challenging than patching a small one.
The Components of a Shower Drain
There are various types of shower drains available on the market. For instance, the Oatey 42045 shower drain, as demonstrated by funbro1 on YouTube, consists of a plastic housing that you attach to the waste pipe and a plastic strainer assembly that you screw into it. The Oatey 42150 is the most commonly used model for fiberglass, acrylic, and other preformed shower bases, and it is available in brass or plastic. With this model, you don’t need to glue it to the waste pipe, so you can replace it without cutting any pipes or needing to attach a pipe extension or replace the entire P-trap.
The Oatey 42150 and similar drain assemblies consist of seven parts. The main component is the drain flange itself, which has a 2-inch, male-threaded outlet that fits securely over the drain pipe when inserted through the shower drain opening. Inside the flange housing, there is a rubber gasket that is placed between the waste pipe and the housing and is secured by a large locknut. The entire assembly is held from underneath by a second locknut, and the seal is completed with a fiber and rubber washer that is installed between the locknut and the shower base. The parts list is completed with a stainless steel strainer that snaps onto the drain opening.
Once water passes through the shower drain, it flows through the P-trap and into the drain line. Unlike sink P-traps, which are easily accessible and assembled with removable compression fittings, shower traps are not accessible and therefore must be glued together to ensure there are no leaks in the connections.
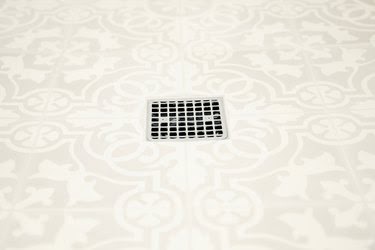
Image Credit:
Sanford Creative
Repairs You Can Make Without Replacing the Shower Drain
If a blockage occurs in the shower waste line and cannot be cleared with a plunger, it is usually possible to remove the strainer by inserting a flat-head screwdriver under the edges and popping it up. In some cases, a set screw may need to be removed first. This will expose the entire drain opening, allowing a snake to be inserted to remove the blockage or a combination of baking soda and vinegar to be used to loosen it. This homemade remedy is commonly used for unclogging drains.
Inside the flange housing, there is a locknut and a rubber gasket that seal the opening of the waste pipe. If the drain is leaking, it may be possible to stop the leak by replacing the gasket. To do this, tap on one of the notches of the locknut with a hammer and screwdriver to loosen it, then unscrew and remove it. The old gasket can be pried out and replaced along with the locknut.
If replacing the gasket does not solve the leak issue, it is likely that the other locknut, which holds the drain assembly to the shower pan, is either not tight enough or has corroded. In this case, it is best to replace the entire shower drain. Before attempting this repair, it is important to confirm that the leak is indeed coming from the drain and not from a loose pipe joint or a hole caused by a nail driven through the floor or wall.
How to Remove and Replace a Shower Drain
Step 1: Expose the Underside of the Shower Pan
To disassemble the drain, a hole needs to be made in the ceiling drywall underneath the shower. The size of the hole should be large enough to provide access. If the drain has been leaking, the wet and possibly dripping drywall underneath the shower drain will indicate where to cut. It is important to remove all water-damaged and moldy drywall.
A rectangular hole is recommended, as it is easier to patch than other shapes. The hole should extend at least as far as the ceiling joists on either side, cutting down the middle of the joists to provide support for the new drywall. A drywall saw and utility knife can be used to make the cuts, taking caution to avoid other pipes and wires that may be present in the ceiling.
For safety reasons, it is advisable to turn off the circuit breakers that control the lights and outlets in the room where the work is being done. Wearing a headlamp can also provide additional light until the location of all wires is determined.
Step 2: Disassemble the Part of the Drain Inside the Shower
Insert a flat-head screwdriver under the drain strainer and pry it up to remove the strainer. This will expose the locknut and gasket inside the drain flange. The locknut has multiple crowns, so place a screwdriver against one of the crowns and tap it with a hammer to turn the nut counterclockwise. Continue tapping until the nut becomes loose enough to be turned by hand. Unscrew and remove the locknut, then use the screwdriver to pry out the rubber gasket underneath it.
Step 3: Remove the Drain Locknut beneath the Shower
Return to the area beneath the shower and locate the locknut that secures the drain to the shower pan. If there is enough space, you can use wide-jaw pliers to loosen it. However, if space is limited, use the same method as before by tapping one of the crowns of the locknut counterclockwise with a screwdriver and hammer until it becomes loose enough to turn by hand.
After removing the locknut, you should be able to lift out the drain housing from the shower pan. If the drain is made of plastic and is stuck, it may be glued to the waste pipe. In this case, you will need to cut the pipe in order to remove it. Instead of cutting at the connection point, which can be difficult in cramped spaces, it is usually easier to cut the P-trap assembly at the trap outlet. Lift the drain from inside the shower and cut it free from there. This will require replacing the P-trap, but it ensures a neater final assembly compared to trying to glue an extension onto a hard-to-reach pipe.
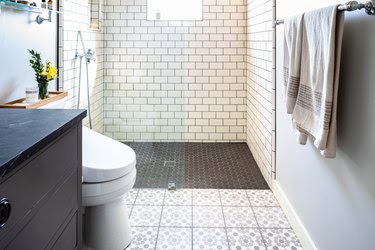
Image Credit:
Stephen Paul for Hunker
Step 4: Prepare the Waste Pipe for the New Drain Assembly
Use a rag to wipe the rim of the waste pipe and remove any leftover putty or debris. Slide the locknut for the new drain onto the pipe, followed by the fiber gasket and the rubber gasket, in that order. You may need to pull the pipe away from the drain opening to fit these parts, so make sure to return it to its original position once you’re finished.
Step 5: Install a New Drain Flange
Clean the shower drain opening to remove any old plumbers’ putty and prepare it for the new drain. Check the area around the drain opening on the shower floor for any hidden cracks. If you notice any cracks, you will need to replace the shower pan.
Apply plumbers’ putty to the underside of the rim of the new shower drain flange. Roll the putty into a rope, wrap it around the flange, and flatten it with your fingers. Some plumbers suggest using silicone caulk to seal the flange, but keep in mind that silicone is adhesive and may make it difficult to remove the flange in the future. Place the flange into the drain opening, ensuring that it fits around the end of the waste pipe.
Apply plumbers’ grease to the rubber gasket and locknut that go inside the drain flange. Insert the gasket and push it down into the gap between the waste pipe and the interior of the flange. Screw on the locknut. Use the flat bar included with the drain by inserting it into the notches on opposite sides of the drain opening. Insert a flat-head screwdriver into the slot in the middle of the bar and use it to turn the nut. Continue tightening until no more putty or caulk is oozing from underneath the rim of the flange. Wipe off any excess caulk or putty with a rag.
Step 6: Attaching the Drain to the Bottom of the Shower Pan
To secure the drain to the underside of the shower pan, start by putting the two gaskets over the threads of the drain flange. Then, screw on the locknut. Tighten it as much as possible by hand and then use wide-jaw pliers or the hammer and screwdriver method to finish tightening.
If you had to remove the old drain and the P-trap, assemble the necessary pieces for the new P-trap and glue them together. Apply plumbers’ putty to the drain flange, insert it through the hole, and go downstairs to attach the fiber and rubber washers and screw on the underside of the drain fitting. Once the drain is fully assembled, you can glue the P-trap assembly to the shower drain and drain line.

Image Credit:
Stephen Paul for Hunker
Step 7: Checking for Leaks
Attach the strainer to the drain flange and turn on the shower faucet. Let the water run for a few minutes while you go downstairs and carefully observe for any dripping water using a flashlight. If you notice any water dripping or beading, tighten both locknuts until the water seepage stops.
Step 8: Repairing the Drywall
Cut a piece of drywall that fits the hole, screw it to the ceiling joists using drywall screws, and then apply drywall tape and joint compound to finish the joints. Typically, you will need to apply at least three coats of joint compound to achieve a smooth repair. After the compound has dried, recreate the ceiling texture using one of the techniques mentioned by Don Pedro or another technique of your choice. Prime and paint the patch or, for a more seamless repair, paint the entire ceiling.
