

Quck answer
To remove and replace a bathtub drain, follow these steps:
1. Gather the necessary tools: pliers, screwdriver, plumber’s putty, and a drain removal tool (if needed).
2. Locate the drain stopper and remove it by unscrewing or lifting it out.
3. Use pliers to loosen and remove the drain flange, the part that sits inside the drain opening.
4. Clean the area around the drain opening and apply plumber’s putty to the new drain flange.
5. Insert the new drain flange into the drain opening and secure it with the provided screws or by tightening it with pliers.
6. Test the new drain by filling the bathtub with water and checking for any leaks.
7. Replace the drain stopper and ensure it is properly secured.
By following these steps, you can successfully remove and replace a bathtub drain.
If you are dissatisfied with your bathtub drain, you can easily replace it with a simple DIY task that takes about five minutes. This may seem like a bold claim considering that most of the drain is located under the bathtub. However, when most people refer to the bathtub drain, they are actually talking about the visible part on the bottom of the tub, which is properly known as the bathtub drain flange. To replace it, you just need to unscrew the old one and screw in a new one.
Over time, the exposed bathtub drain flange can become stained, corroded, and even start to leak. These are all good reasons to replace it. Additionally, if the stopper mechanism stops working, installing a new one usually requires replacing the flange, unless the tub has a trip lever. In that case, you can remove the entire stopper mechanism and install a new one without removing the flange. However, if you want to replace a trip-lever mechanism with a different type of stopper, you will typically need a new bathtub drain flange.
The Bathtub Drain Explained
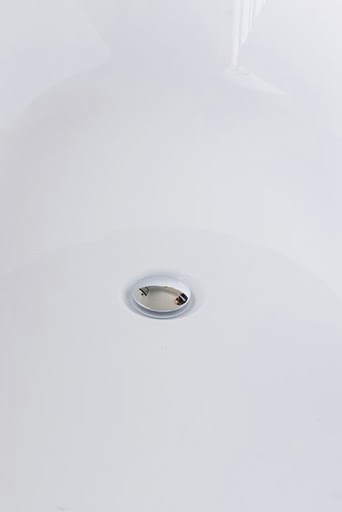
Image Credit:
Sanford Creative
Most of the bathtub drain is hidden beneath the floor and behind the tub wall. Usually, you don’t have to remove any drywall or floorboards to access it. However, if you ever need to, you will find the following parts:
- The overflow pipe, which extends vertically from the overflow plate on the tub wall to a tee located a few inches below the bottom of the tub.
- The P-trap, which is located just past the downward vertical outlet of the tee. On the other end of the trap, a horizontal length of drain pipe connects the tub drain to the waste system.
- The drain shoe, which is a horizontal length of drain pipe that extends from the tee to the bathtub’s drain opening. This fitting has an elbow with female threads on one end that connects to the male-threaded end of the drain flange. The drain flange is the only visible and easily accessible part of the drain assembly.
If your tub has a trip lever in place of the overflow plate, it operates either a pop-up stopper or an internal stopper. Inside the overflow pipe, there is a linkage that extends to the tee. At the end of the linkage, there is either a weighted metal cylinder that blocks the drain when the lever is up or a spring that operates a rocker arm, which in turn operates a pop-up stopper. You can remove the linkage by taking off the trip-lever plate, and you can directly pull out the rocker arm from the drain opening.
Types of Bathtub Drain Stoppers
Image Credit:
Mitch Geiser
If you are not satisfied with your current drain stopper, replacing your bathtub drain flange provides an excellent opportunity to change it. Some stoppers screw into a threaded opening in the middle of the flange crossbar, while others work without a crossbar. In most cases, the stopper comes with its own flange. Popular alternatives to trip-lever stoppers include:
There are different types of bathtub drain stoppers available.
One type is the toe-touch stoppers, which have a spring-loaded mechanism that you activate with your foot.
Another type is the lift-and-turn stoppers, which are fully removable and make it easy to clear the drain and use a snake or plunger to clear clogs.
There are also flip-it stoppers, which have a rotating disk with a gasket that stops the water when the disk is horizontal. Watco, a leading plumbing parts manufacturer, sells a version of this stopper called the PressFlo bathtub drain stopper.
You can find these and other types of stoppers on plumbing sites like Badeloft. If you have a lever-activated stopper that you like, you can keep it and just replace the corroded drain flange with a compatible one.
To remove and replace a bathtub drain flange, you will need a new drain flange, plumbers’ putty, a drain key or smart dumbbell, a screwdriver, a wrench, a putty knife, and a damp rag.
First, purchase a drain key or smart dumbbell from a plumbing supply outlet. These tools make unscrewing the drain flange easier and safer. Use a smart dumbbell if both the old and new drain flanges have crossbars, and use a drain key if one or both lack a crossbar.
Next, unscrew the drain flange from the drain shoe. Insert the end of the smart dumbbell or the drain key into the drain opening and turn counterclockwise until the flange comes loose and can be removed.
After that, clean the drain opening by chipping out old plumbers’ putty with a putty knife and wiping it thoroughly with a damp rag to remove any remnants.
Step 4: Apply Plumbers’ Putty to the New Drain Flange
Take out some plumbers’ putty from the container and shape it into a ball that is approximately 3/4 inches in diameter. Roll the putty in your hands until it forms a cylinder shape. Apply the putty to the underside of the flange rim, ensuring that the ends meet and there are no empty spaces.
Step 5: Attach the New Bathroom Drain Flange to the Drain Shoe
Attach the new flange to the drain shoe and tighten it as much as possible by hand. Be careful to align it correctly to avoid damaging the threads. Use a drain key or a wrench to further tighten the flange until no more putty is coming out from underneath the rim. It is crucial to tighten it securely to prevent any leaks.
If using a drain key, hold the large nut with one hand and twist the top nut clockwise to secure the wings against the flange. Use a wrench to continue turning the nut clockwise and tighten the flange.
Step 6: Remove Excess Putty
Roll any excess putty into a ball and place it back in the container. Use a damp cloth to wipe away any leftover putty residue.
Step 7: Install the Stopper and Check for Leaks
Install the drain stopper by screwing it onto the flange or follow the manufacturer’s instructions. Close the stopper and slightly open the bathtub faucet to allow enough water to fill the area around the stopper. Wait for approximately five minutes to ensure that the water level remains the same, then open the stopper and let the water drain out.
