
Quck answer
Installing cabinet hardware can be a simple process if you follow these steps:
1. Measure and mark: Determine the placement of your hardware by measuring and marking the desired location on the cabinet doors or drawers.
2. Drill holes: Use a drill with the appropriate size bit to create holes at the marked locations. Make sure to drill straight and avoid drilling through the back of the cabinet.
3. Attach hardware: Place the screws through the back of the cabinet and align them with the holes. Tighten the screws securely to attach the hardware.
4. Test and adjust: After attaching the hardware, test the doors or drawers to ensure they open and close smoothly. If needed, adjust the placement of the hardware for better alignment.
By following these steps, you can easily install cabinet hardware and enhance the appearance of your cabinets.
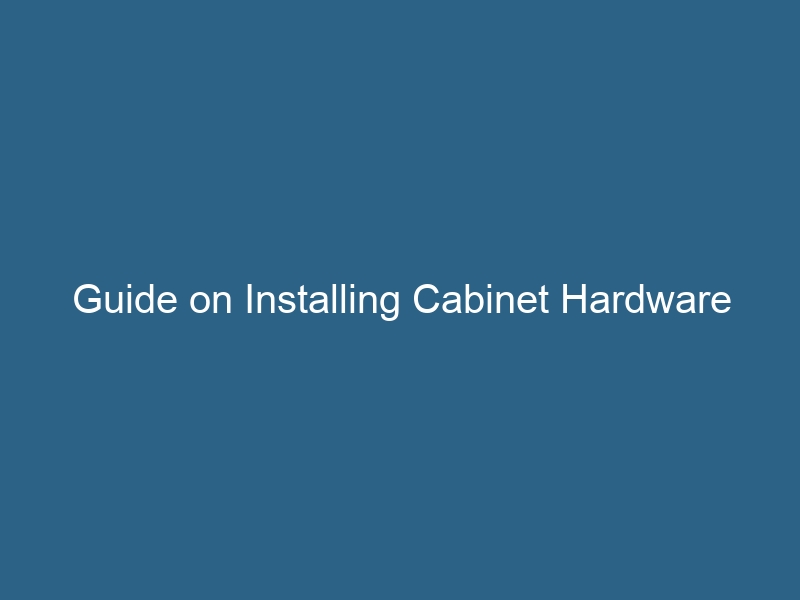
Putting in kitchen cabinet hardware is a fairly simple task, and this small change can make a big difference in your entire kitchen. The knobs and pulls you choose will not only affect the style of your kitchen but also its functionality. By using the correct tools and following step-by-step instructions, you can create a comfortable kitchen that will last for years to come.
Common Types of Kitchen Hardware
Kitchen hardware serves both decorative and practical purposes. According to Old House Journal, you can find a wide range of options for your kitchen, from vintage Art Deco chrome to colorful Fiestaware handles. If your kitchen has a more modern style, there are also plenty of choices available at big-box retailers and online. There are two main types of handles that are attached to cabinets:
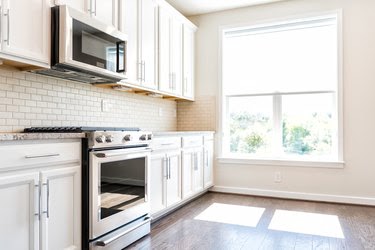
- Cabinet Knobs: These small handles are mounted with a single screw to a door or drawer face.
- Cabinet Pulls: This type of handle is larger than a knob and is usually mounted with two screws on a door or drawer face. Some pulls, such as ring and pendant pulls, only require one screw. Drop-handle pulls need a backplate instead of screws. There are also finger pulls that are mounted to the top edge of the cabinet with a projection that is deeper than the door or drawer face. Recessed pulls are flush-mounted on the door and drawer faces.
Choosing the Right Cabinet Hardware
Before buying new hardware, measure the widths of the flat areas on your cabinet doors and drawer fronts to ensure that your chosen knobs and pulls will fit properly. Some cabinets may have smaller doors and drawer fronts where larger pieces of hardware won’t fit. Therefore, when selecting the pieces you want, base them on the width of the smallest drawer or door. Also, take note of how flat the area is where the base of the knob or pull will sit, as some pieces have bases that are too wide.
Most drawers and pulls come with 1-inch screws, which may be too small to anchor properly. On the other hand, if the hardware you choose has longer screws than your cabinet doors and the drawer fronts are thick, you’ll need to find suitable replacements. Measure the thickness of the doors and drawers to determine if the screws you have will work. You can easily find replacement screws at any hardware store. Bring a knob or pull with you to ensure that the screw threads are compatible.
Adding new hardware to a cabinet door is a simple DIY project.
Image Credit:
ablokhin/iStock/GettyImages
Items You Will Need
-
Cabinet hardware (knobs and pulls)
-
Putty adhesive
-
Masking tape (optional)
-
Backplate (optional)
-
Wood putty (optional)
-
Thread sealant
-
Screws
-
Super glue (optional)
-
A few pieces of 1/2-inch-thick scrap wood (optional)
-
Cabinet drill template (optional)
-
Pencil
-
Drill with brad-point drill bits
-
Clamp
-
Screwdriver
Installation of Cabinet Hardware on Doors
If you already have knobs and pulls, simply remove the old ones and replace them with the new ones by screwing them into the same holes. If you don’t have existing hardware, there is a step-by-step process to follow in order to drill holes that align on cabinet doors and drawers.
Step 1: Measure the Cabinet Handles
There are no specific rules for the placement of knobs and pulls on kitchen cabinets. If you don’t have existing holes, you will need to do some measuring to properly align them before drilling.
For doors and drawer fronts with rails and stiles, align the knobs with the top of the bottom door rail. For pulls, align their bottoms with the top of the door rail and center them on the door stile. Attach the hardware to the door temporarily with putty adhesive to visualize the appearance.
For surfaces without rails and stiles, center the knobs on the drawer fronts. On doors, knobs are usually aligned opposite the hinges. Place them between 1 and 4 inches from the top or bottom edge of the door according to personal preference. This spacing allows for easy gripping of handles to open and close doors.
Pulls are typically vertical on cabinet doors. When placing pulls, use a range of 1 to 4 inches from the top or bottom edge of the door for optimal placement. On drawers, pulls are horizontal. If the drawers are 24 inches wide or larger, you can use pulls on a single drawer front or consider using one larger, centered pull.
Step 2: Mark the Holes With a Template
To quickly install multiple pulls and knobs, you may want to use a cabinet drill template. This template is a metal or plastic plate with standard hole spacing for various sizes of knobs and pulls. Hang the template from the edge of the door or drawer and mark the hole locations with a pencil or drill the holes with the template in place. To avoid confusion, cover the entire template with masking tape and only poke holes through the ones you intend to use. Hang the template on the door or drawer and mark the drilling spots with a pencil.
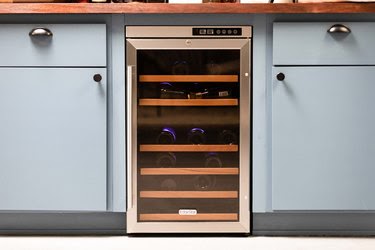
Image Credit:
Stephen Paul for Hunker
Step 3: Cover Old, Unused Holes
When switching from pulls to knobs, cover the old holes with a backplate. If you don’t have a backplate, you can use wood putty as a filler. If you are unsure of the appropriate shade, purchase light, medium, and dark tones that closely match the wood grain of your cabinets and mix them to achieve the desired color.
Step 4: Prevent Cabinet Knobs From Loosening or Twisting
Apply a small amount of thread sealant to the hardware screws to prevent them from loosening. Additionally, if you have oblong or rectangular knobs, they may twist over time. To prevent this, add a small amount of super glue to the back of the knob before installation. Keep in mind that this will make the knobs permanent, so do not attempt to remove them afterwards.
Step 5: Create the Handle Openings
Using a drill, make holes from the front to the back of the drawer or door face. Ensure that the drill bit is perpendicular to the surface. Apply moderate pressure and drill slowly to avoid tearout, which is the splintering of wood around the hole’s edges. To further prevent tearout, you can attach a small piece of scrap wood (known as backerboard) to the backside of the door before drilling. This will ensure that the drill bit exits the back of the door and goes into the backerboard.
Step 6: Insert the Cabinet Handles into the Openings
Place the handles into the newly created holes and fasten them using a screwdriver. Avoid using a power drill as it can easily overtighten the screws.
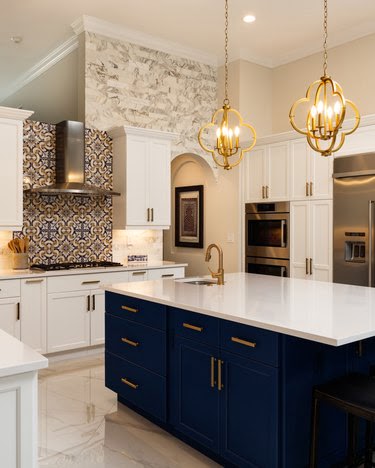
Cabinet hardware is available in pull and knob designs.
Image Credit:
RAUL RODRIGUEZ/iStock/GettyImages
Additional Tips for Installing Cabinet Hardware
Use a sharp brad-point bit to ensure clean holes. A dull drill bit can cause more harm than good, potentially damaging the wood behind the door or drawer front.
If you are new to installing hardware, practice drilling holes before working on your doors or drawers. Make sure to make any necessary adjustments to the cabinet, drawer, or door before installing the hardware. Once installed, any unadjusted parts will appear uneven.
Select a drill bit that is slightly larger than the screw diameter, but not too large. The screw should fit snugly in the hole without requiring excessive force. Holes that are too large can cause the hardware to loosen and result in a weaker installation.
If you have any doubts or concerns during the installation of your cabinet hardware, seek assistance from a professional. While hardware installation is generally straightforward, drilling can potentially damage cabinet doors and drawers. Replacing them can be costly, so it is important to get it right the first time.
